
CMS Data Access on NRP
▶ Open notebook in JupyterHub — unlike the rest of this training, this notebook uses a Python kernel, not bash, so the uproot/matplotlib analysis at the end plots directly inline instead of saving a file. Shell commands are prefixed with !. Most of the certificate setup is interactive terminal work (password prompts), so the notebook mostly points you to a terminal.
Time: 00:00-00:40
This lesson uses the NRP USCMS Analysis Hub (uscms-af.nrp-nautilus.io) — the JupyterHub-based environment introduced as "Method 1" on the setup page. If you've been using your own machine for the rest of this training, this is the lesson where you switch over — there's no local install for the tools below. CMS data lives on grid storage (EOS, dCache, and friends) protected by the same CERN grid-certificate infrastructure used across WLCG. kubectl (covered on the setup page via grid-kube-setup) gets you onto the Nautilus cluster; a grid certificate and the short-lived X.509 proxy derived from it are what get you into CMS data. This lesson sets one up, then uses it to pull a real CMS file and make a plot.
Setting up your grid certificate
You'll need your CERN grid certificate exported as a .p12 file (from CERN's certificate portal or your browser's certificate manager — this is the same file you'd use to set up a browser certificate for CERN SSO).
1. Upload the .p12 file
Drag your .p12 file into the JupyterLab file browser on the left (or use the Upload button). It only needs to live there for the import step below — you can delete it from the file browser afterward.
2. Import the certificate
🖥️ Terminal step — open a terminal in JupyterLab and run:
grid-cert-importYou'll be asked for two things:
- The import password — the one you chose when exporting the
.p12file. - A PEM pass phrase — this protects the key at rest on the hub. You'll type it every time you create a proxy, so keeping it the same as the import password is fine and avoids confusion.
Expected output
jovyan@jupyter-...:~$ grid-cert-import
Importing: /home/jovyan/myCertificate.p12
  existing usercert.pem -> usercert.pem.20260804150152.bak
  existing userkey.pem -> userkey.pem.20260804150152.bak

You will be asked for:
  1. the import password  -- the one you chose when exporting the .p12
  2. a PEM pass phrase    -- this protects the key at rest on NRP.
     You will type it every time you create a proxy. Keeping it the same
     as the import password is fine and avoids confusion.

Enter Import Password:
Enter Import Password:
Enter PEM pass phrase:
Verifying - Enter PEM pass phrase:

Installed:
  subject=DC=ch, DC=cern, OU=Organic Units, OU=Users, CN=ddiaz, CN=821822, CN=Daniel Diaz
  notBefore=Aug  4 05:43:37 2026 GMT
  notAfter=Sep  8 05:43:37 2027 GMT

Next:   grid-proxy-init
3. Create your proxy
🖥️ Terminal step:
grid-proxy-initThis prompts for the PEM pass phrase from the step above, contacts the CMS VOMS server, and writes a short-lived proxy to ~/.globus/x509up.
Expected output
jovyan@jupyter-...:~$ grid-proxy-init
Enter GRID pass phrase for this identity:
Contacting  voms2-cms-auth.cern.ch:443 [/DC=ch/DC=cern/OU=computers/CN=voms2-cms-auth.cern.ch] "cms"...
Error contacting  voms-cms-auth.cern.ch:443 for VO cms: voms-cms-auth.cern.ch
Contacting  voms2-cms-auth.cern.ch:443 [/DC=ch/DC=cern/OU=computers/CN=cms-auth.cern.ch] "cms"...
Remote VOMS server contacted succesfully.

Created proxy in /home/jovyan/.globus/x509up.

Your proxy is valid until Wed Aug 12 15:02:24 UTC 2026

  /DC=ch/DC=cern/OU=Organic Units/OU=Users/CN=ddiaz/CN=821822/CN=Daniel Diaz/CN=1734779629
  691198
  cms

Proxy written to /home/jovyan/.globus/x509up
To use it from pods in other namespaces:  grid-proxy-publish <namespace> [...]
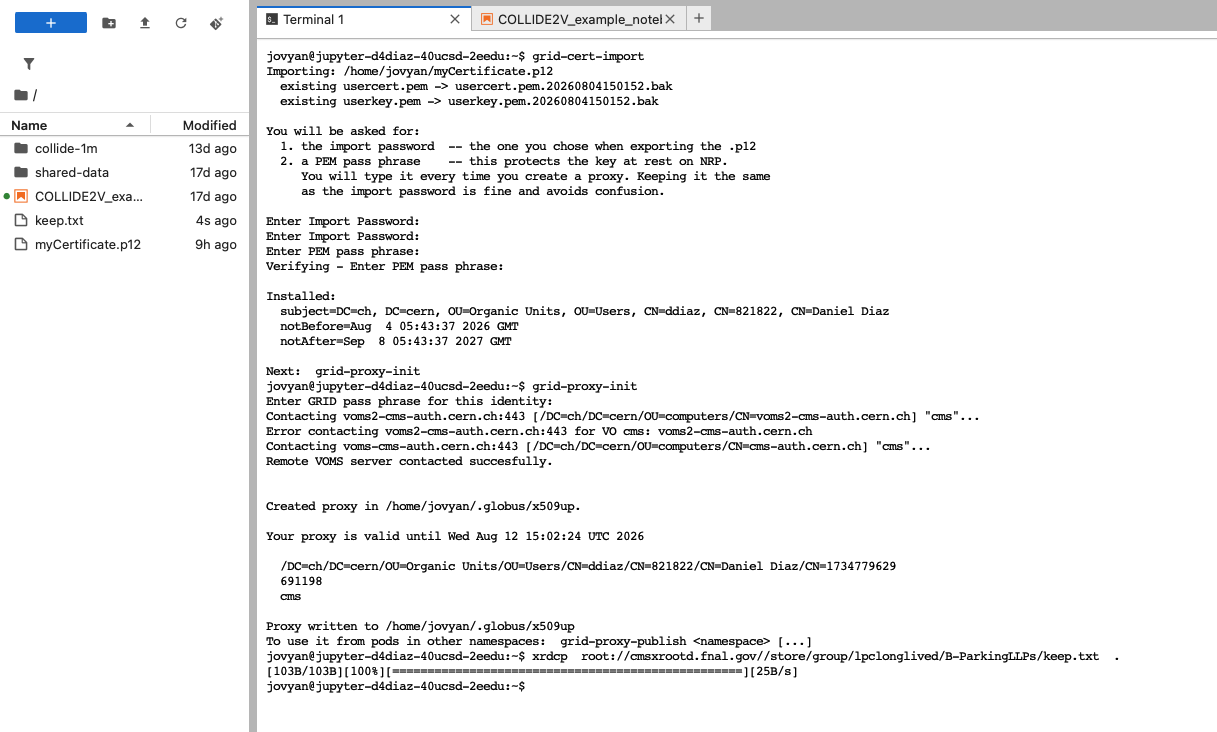
A voms2-... server occasionally times out on the first attempt (as in the transcript above) — grid-proxy-init retries automatically, so this is expected and not a failure.
Access CMS data with uproot
Use your proxy from Python: pull down one real CMS NanoAOD-style file from grid storage and plot something from it with uproot. This also doubles as your proxy verification — if the copy below succeeds, your proxy is good.
🖥️ Terminal step — xrdcp needs a real terminal here, not a notebook cell; run it in the same JupyterLab terminal as the steps above. cd into the same folder as the notebook first — the Python cells below open nanoout_1.root with a relative path, which only resolves if the file actually lands next to the notebook rather than in your terminal's default directory:
cd ~/cms-hats/workspace/notebooks
xrdcp -f root://eoscms.cern.ch//eos/cms/store/group/cmst3/group/l1tr/maglowac/AD_HLT_PF/QCD_Bin-Pt-15to7000_TuneCP5_13p6TeV_pythia8/re-emul_Run3Winter25MiniAOD-FEVTOUTPUT_142X_v7-v1/251124_134438/0000/nanoout_1.root nanoout_1.root
~/.globus/x509up is the default location xrdcp looks for a proxy, so you don't need to set anything explicitly.
The notebook for this episode uses a Python kernel (unlike the rest of this training), so the check below and the plot after it are both plain Python cells — no python3 <<'PY' ... PY wrapper needed. The hub image isn't guaranteed to have the HEP Python stack installed, so check first and install into your user site-packages if it's missing:
import importlib.util
import os
import subprocess
import sys

# cwd=~ avoids a pip bug where it crashes if the process's working directory
# no longer exists (os.getcwd() -> FileNotFoundError), which can happen on some
# JupyterHub setups.
home = os.path.expanduser("~")
for pkg in ("uproot", "awkward", "matplotlib"):
    if importlib.util.find_spec(pkg) is None:
        subprocess.run(
            [sys.executable, "-m", "pip", "install", "--user", "--quiet", pkg],
            check=True, cwd=home,
        )

# Some hub images (notably conda-based ones) don't put the --user
# site-packages directory on sys.path by default, so a successful pip
# install can still leave the import failing. Make sure it's there.
import site
user_site = site.getusersitepackages()
if user_site not in sys.path:
    sys.path.insert(0, user_site)
print("Dependencies ready")
Open it with uproot, right here in the notebook, and see what's inside before plotting anything:
%matplotlib inline
import awkward as ak
import matplotlib.pyplot as plt
import uproot

events = uproot.open("nanoout_1.root")["Events"]
all_keys = events.keys()
print(f"{len(all_keys)} branches in the Events tree. First 100:")
for name in all_keys[:100]:
    print(f"  {name}")
Events is the standard NanoAOD tree name. NanoAOD files typically have hundreds of branches, so this only prints the first 100 — Muon_pt, MET_pt, and similar branches are in there too if you want to plot something else.
Jet $p_T$ distribution
jet_pt = ak.flatten(events["Jet_pt"].array(entry_stop=5000))

plt.hist(jet_pt, bins=50, range=(0, 200))
plt.xlabel("Jet $p_T$ [GeV]")
plt.ylabel("Jets / bin")
plt.title(f"Jet $p_T$ spectrum ({len(jet_pt)} jets, first 5000 events)")
plt.show()
A simple cut
Analyses almost always work with a selected subset of events or objects, not the whole sample — this is usually called a "cut." Here's the smallest possible version: keep only jets above some $p_T$ threshold, and compare the distribution before and after:
pt_cut = 25  # GeV
jet_pt_cut = jet_pt[jet_pt > pt_cut]

print(f"Jets before cut: {len(jet_pt)}")
print(f"Jets with pT > {pt_cut} GeV: {len(jet_pt_cut)}")

plt.hist(jet_pt, bins=50, range=(0, 200), histtype="step", label="all jets")
plt.hist(jet_pt_cut, bins=50, range=(0, 200), histtype="step", label=f"$p_T$ > {pt_cut} GeV")
plt.xlabel("Jet $p_T$ [GeV]")
plt.ylabel("Jets / bin")
plt.title("Effect of a simple $p_T$ cut")
plt.legend()
plt.show()
Try changing pt_cut, or cutting on a different branch entirely (Jet_eta, Muon_pt, ...) — same pattern: a boolean comparison on an awkward array, which is itself usable as a mask.
Clean up
Proxies are short-lived by design (the transcript above expires in about a week), so there's nothing to revoke. Remove the file you copied down:
rm -f nanoout_1.rootReference: sharing your proxy with another namespace
This is reference material, not something to actually run in this training — there's no need for you to publish your proxy anywhere today. It's here because you'll likely want it later, once you're running your own jobs outside this tutorial.
Your proxy lives at ~/.globus/x509up on the hub, but Kubernetes Jobs run in a namespace and can't reach your home directory directly. grid-proxy-publish copies your proxy into a namespace as a Secret, so Jobs there can mount it and use it the same way you just used it from the terminal:
grid-proxy-publish <namespace>Never run grid-proxy-publish against a shared or team namespace — only your own personal one.
Any member of a namespace can read that namespace's Secrets. If you publish your proxy to a shared namespace, every other member can use your proxy — acting as you against CMS grid storage — without your knowledge. Since a grid proxy is tied to your personal identity and the CERN Certificate Authority's usage policy holds you responsible for whatever it's used for, sharing access this way is a policy violation even if nothing goes wrong technically.
If a Job in a shared namespace needs grid data access, have the person who runs that Job publish their own proxy there — don't publish yours on their behalf.
If you do this and later want to remove a proxy Secret from a namespace:
kubectl get secrets -n <namespace>
kubectl delete secret -n <namespace> <secret-name>