
Introduction, Access & Resource Requests
Slides
Questions & polls
Drop questions here at any point during the hour — we'll work through them as we go and in the Q&A at the end.
Not loading? Open it directly at app.sli.do/event/8FY6gX1uNxrVyYpeSyWPA3.
Questions
- What is the National Research Platform, and what does it offer a classroom?
- How do students and instructors get access?
- How do I request the resources a course needs?
Objectives
- Describe what NRP provides and where JupyterHub fits.
- Sign in through CILogon and reach a working terminal.
- Know how to request a namespace and an allocation for a course.
Time: 00:00–00:15
Welcome to the NAIRR AI Education Webinar Series. This hour has one concrete goal: show you what it takes to run your own JupyterHub classroom on the National Research Platform — and then actually deploy one.
This first segment covers what NRP is, how you and your students get in, and how to ask for the resources a course needs. The rest of the hour is the hands-on part.
NRP as a NAIRR Classroom provider
For teaching, NRP acts as a classroom provider: you get a Jupyter platform for your course plus access to NRP resources — CPU, GPUs, storage, and LLM services — without running any infrastructure yourself.
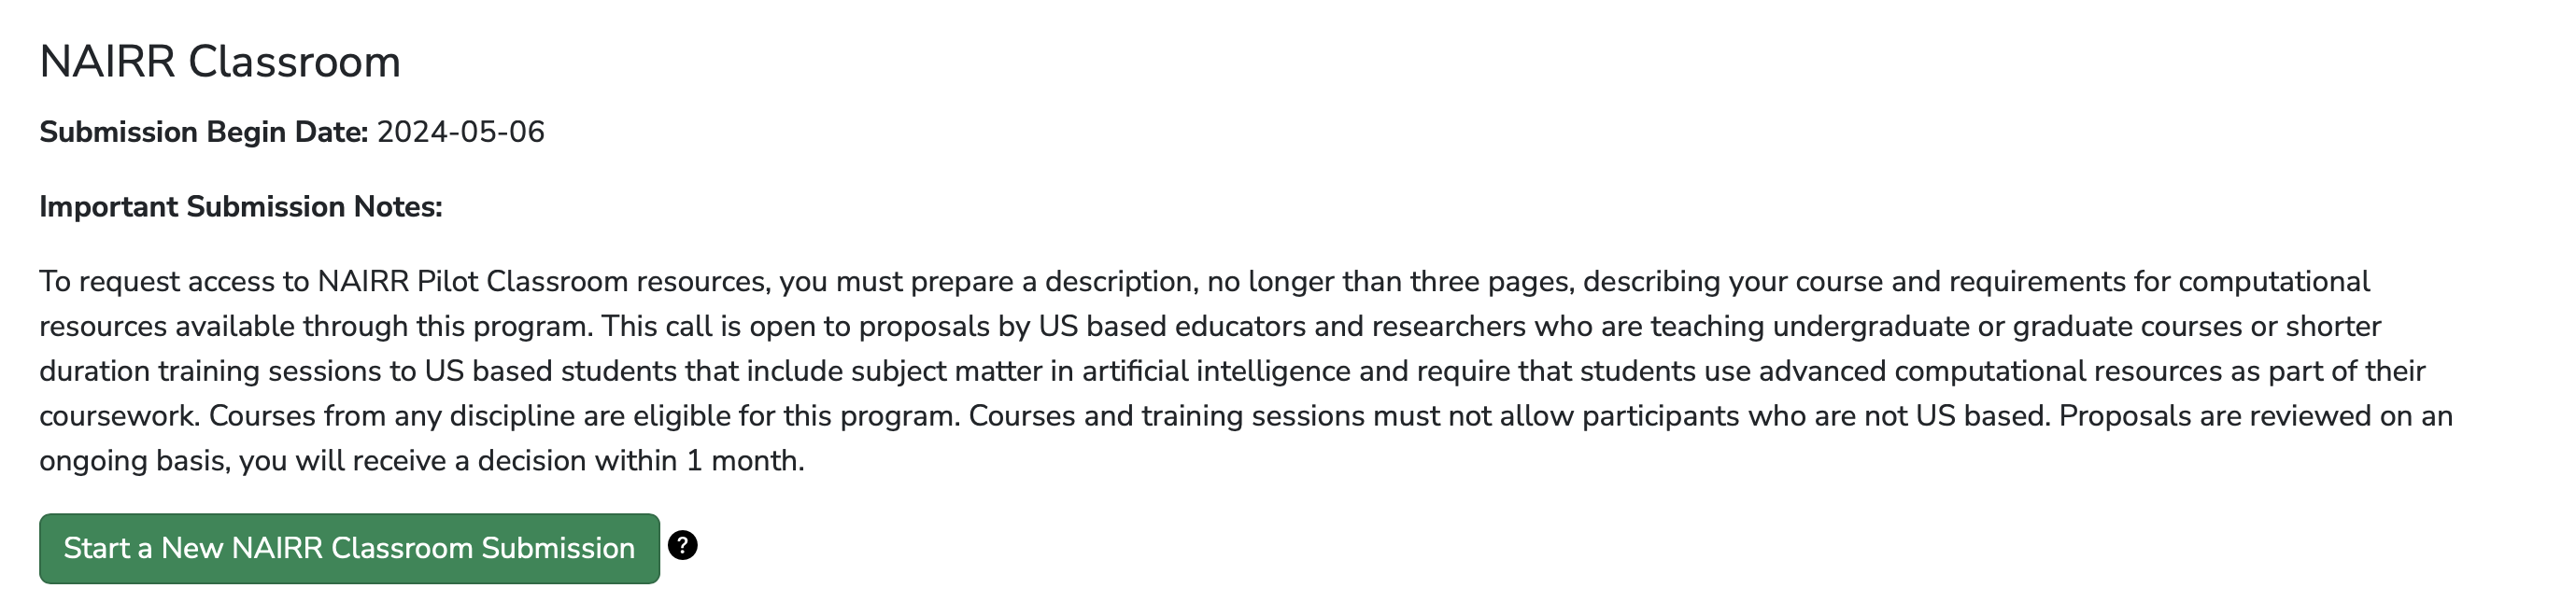
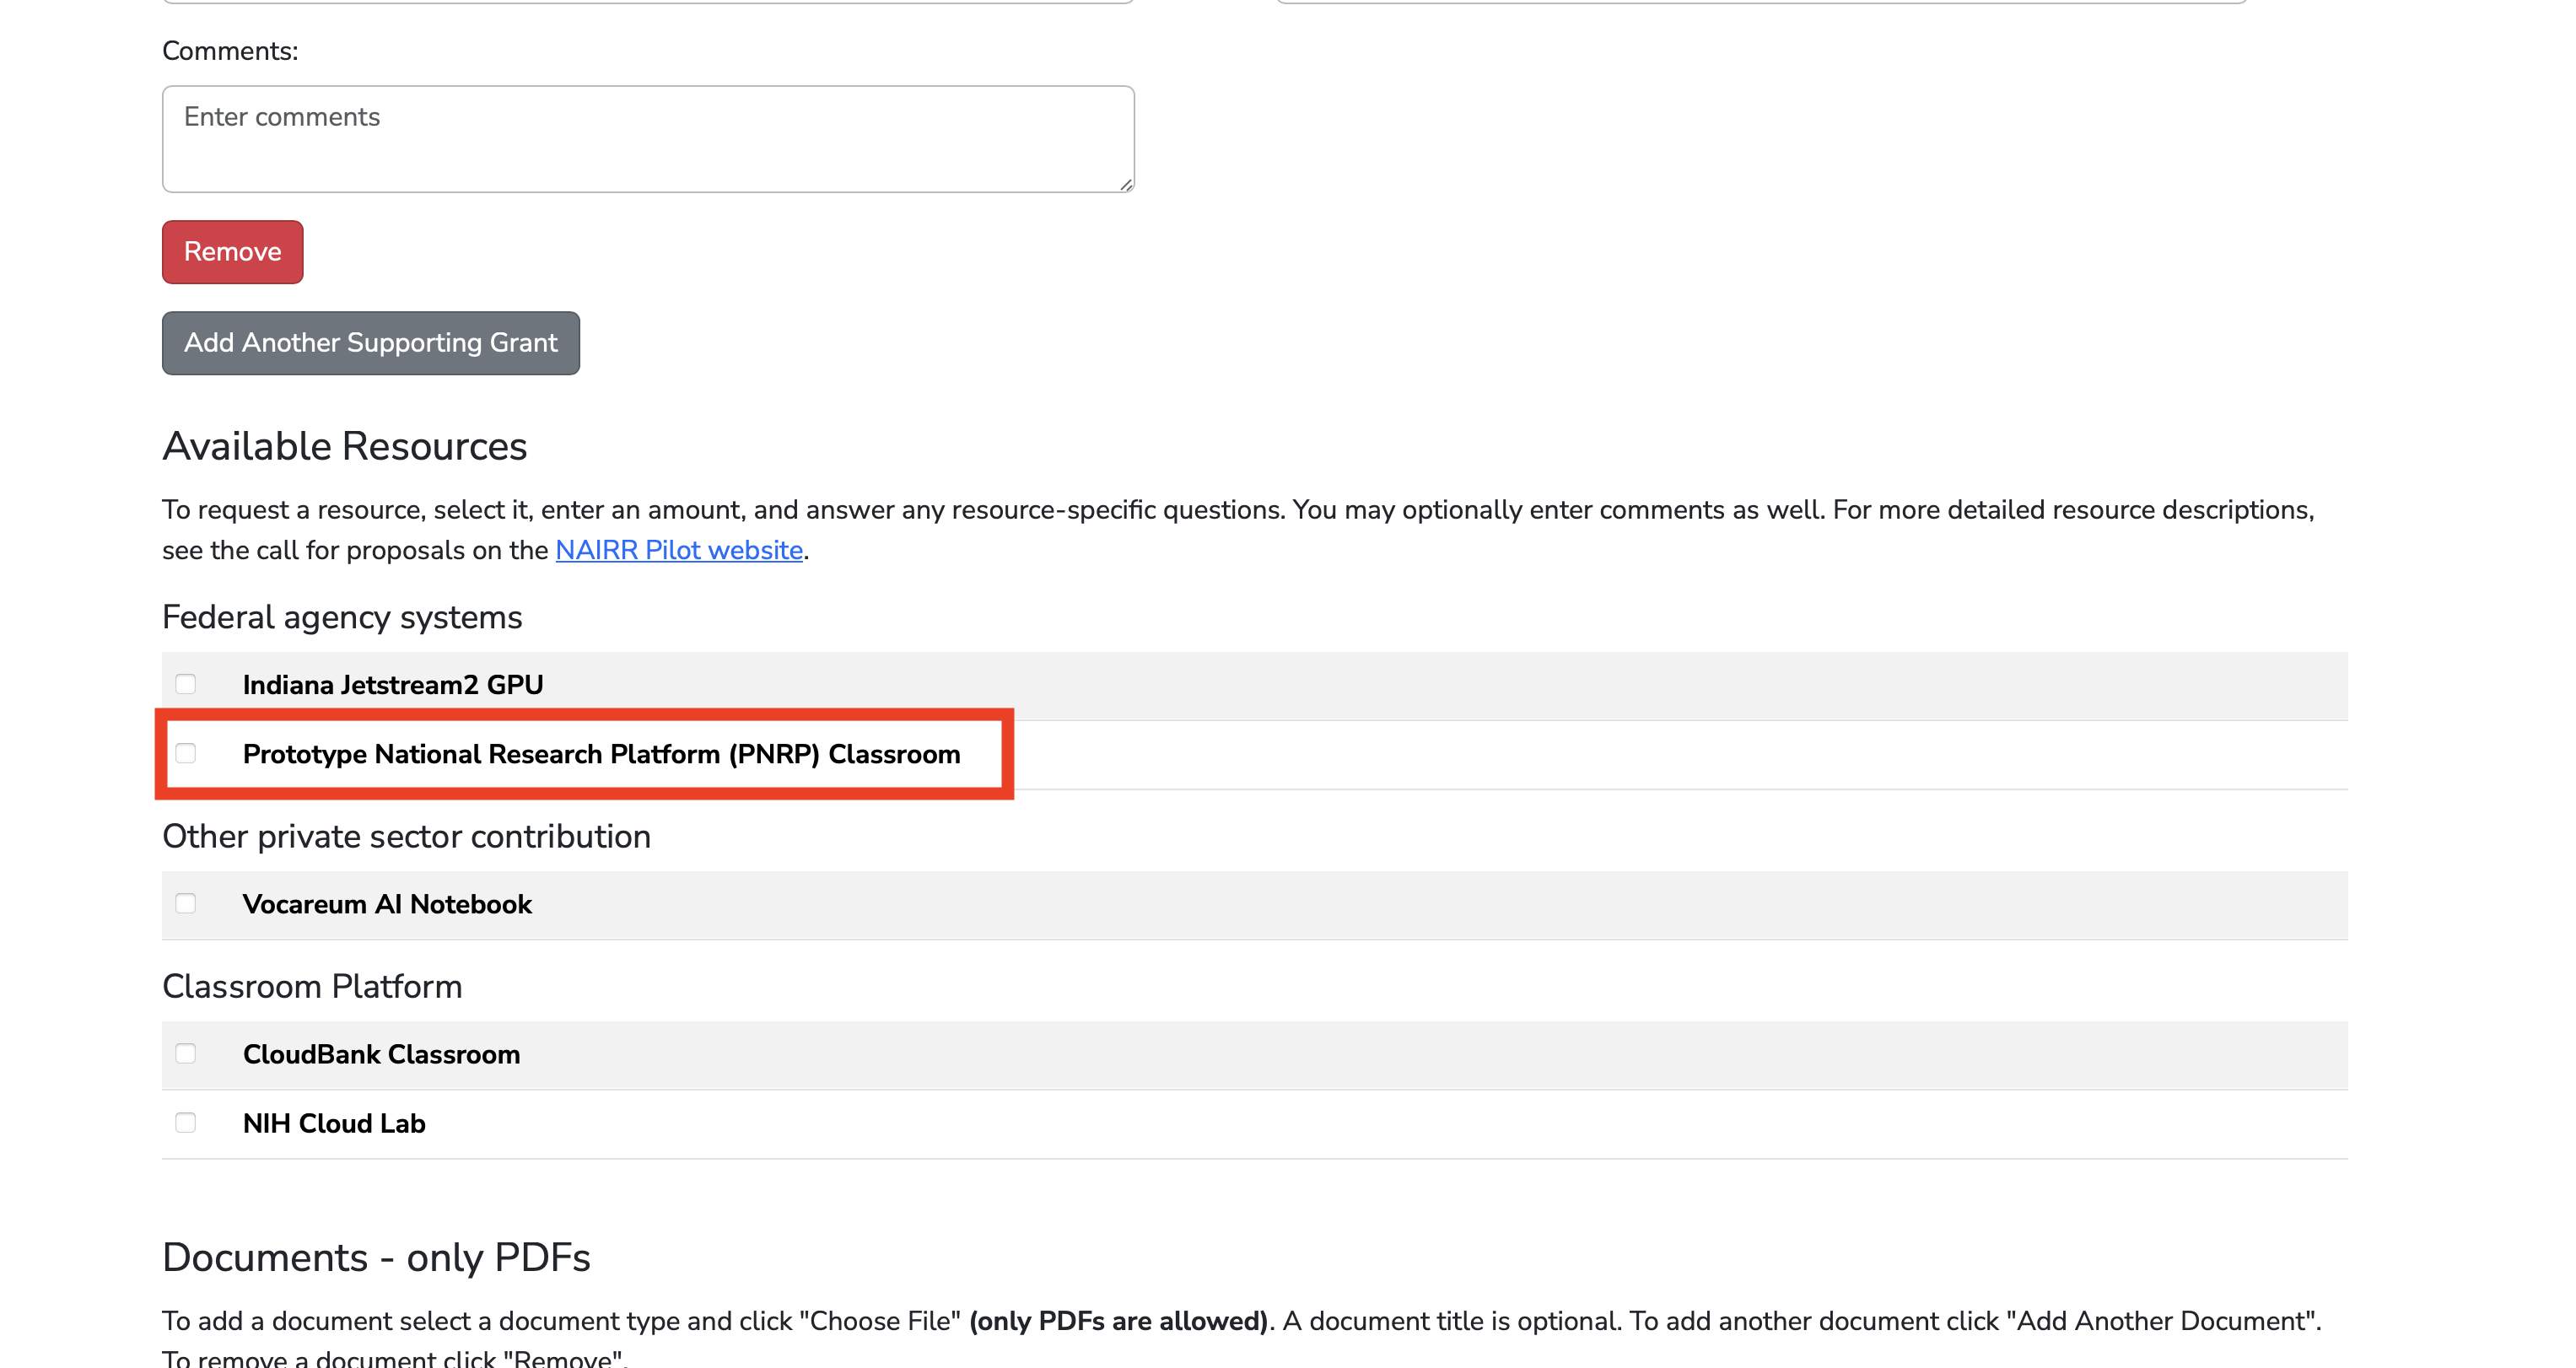
What that means in practice for an instructor:
| You want | NRP gives you |
|---|---|
| Every student in the same environment | A container image you control, identical for the whole class |
| No laptop setup on day one | Browser-based JupyterLab, campus login |
| GPUs for a deep-learning unit | GPU profiles on the spawn menu, with per-profile limits |
| Shared datasets and notebooks | One RWX volume mounted into every student's server |
| No passwords to distribute | CILogon institutional login |
What NRP provides
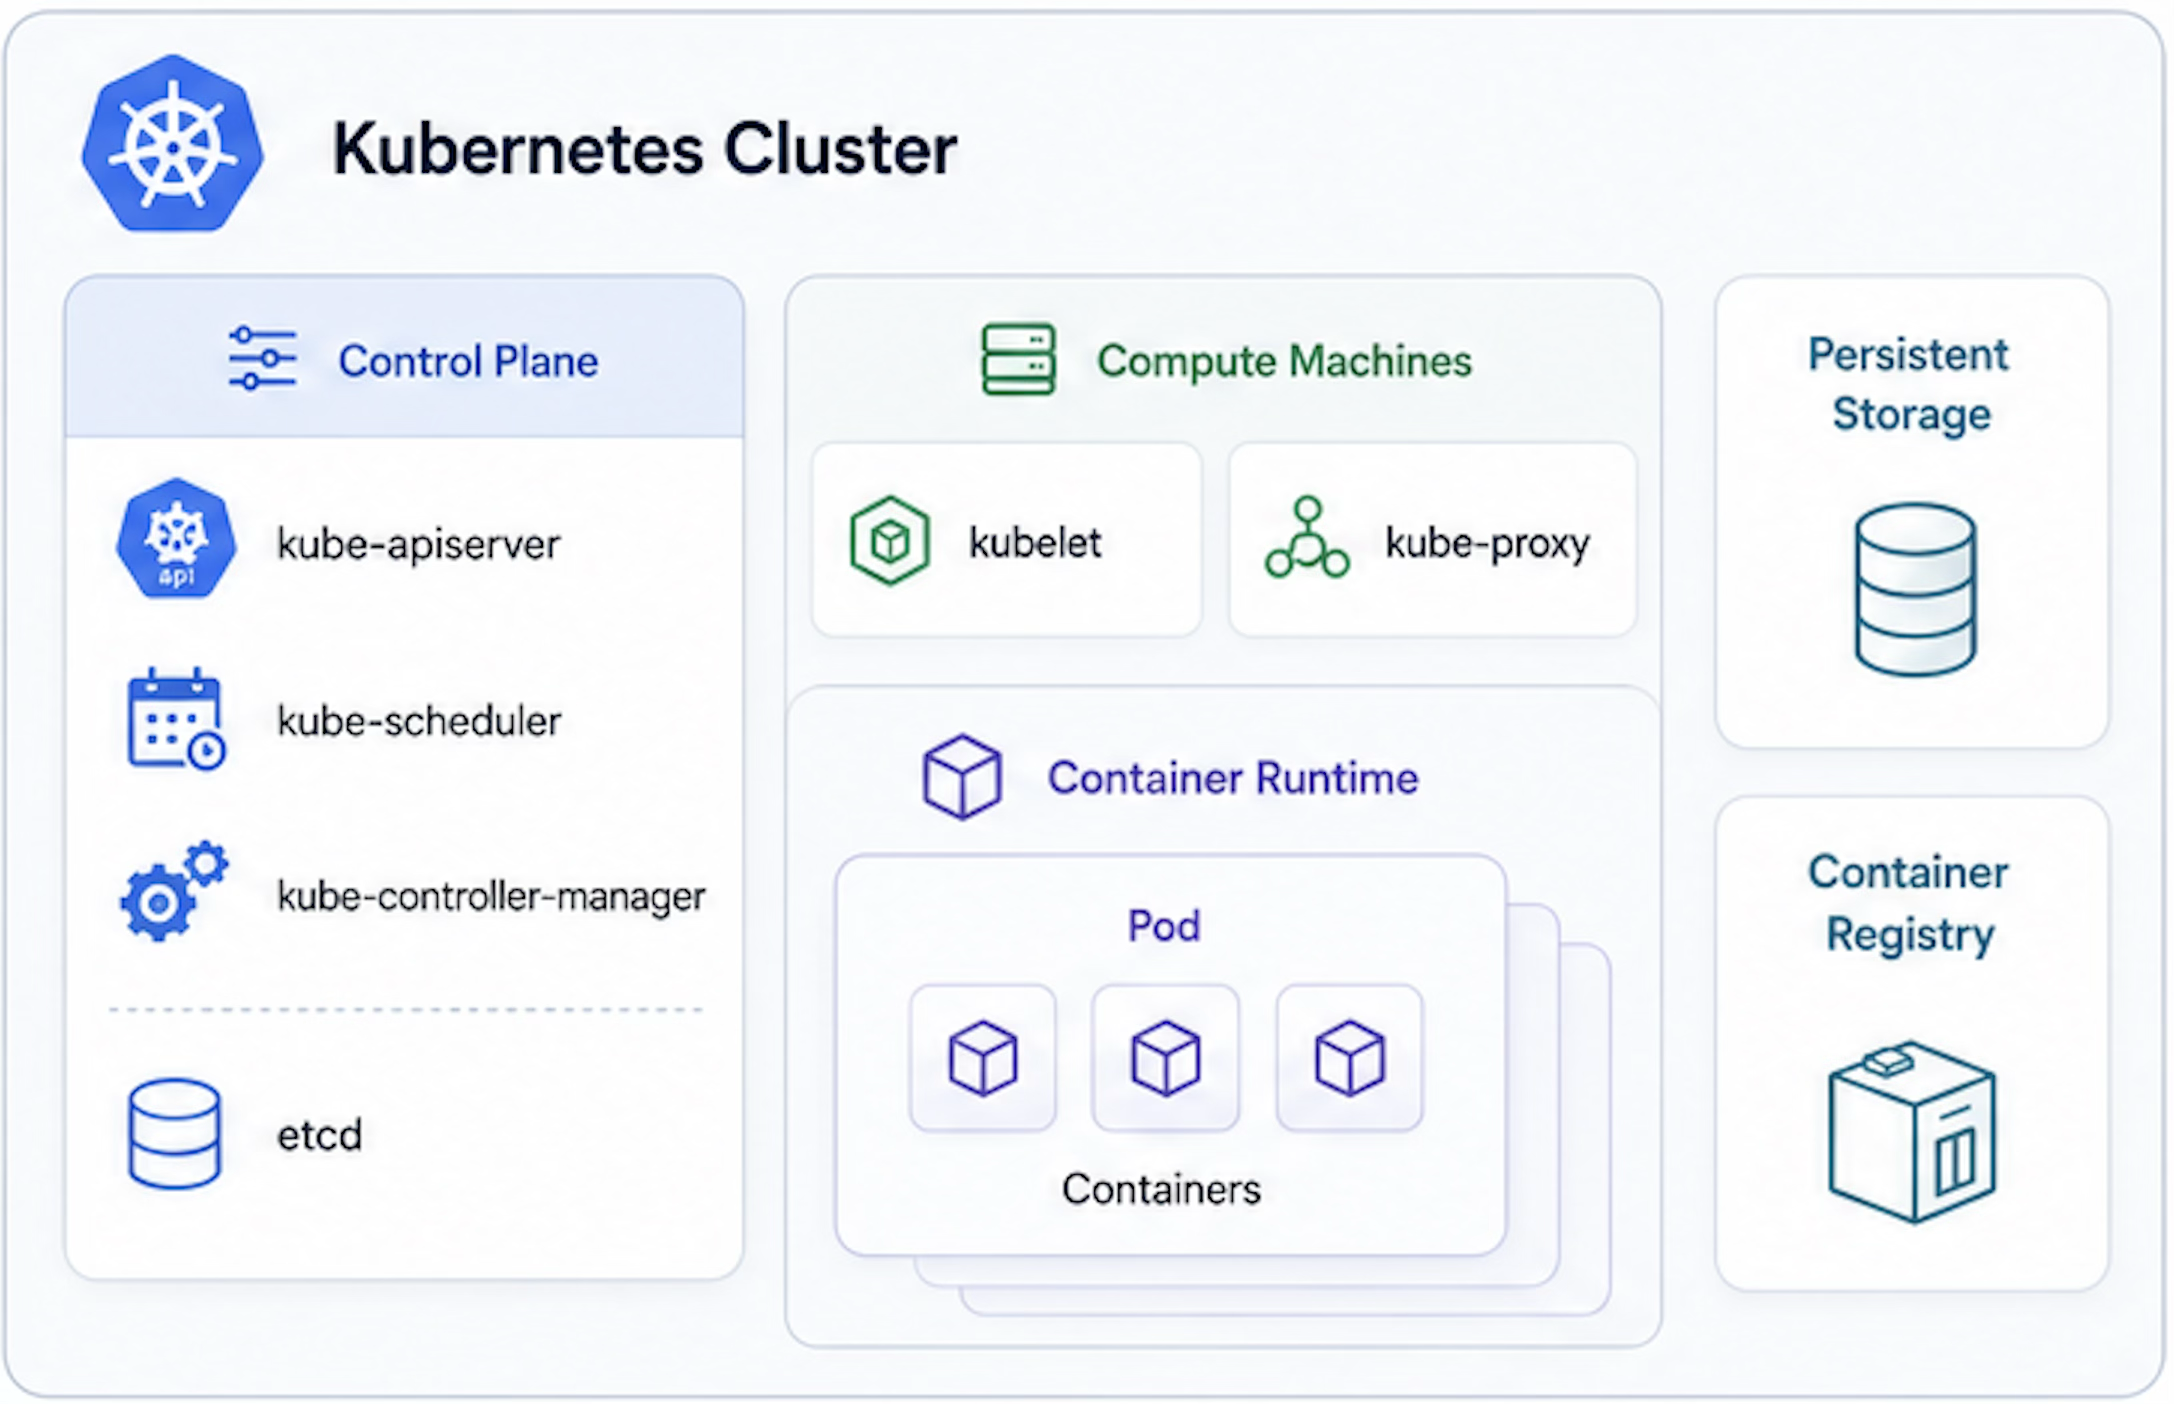
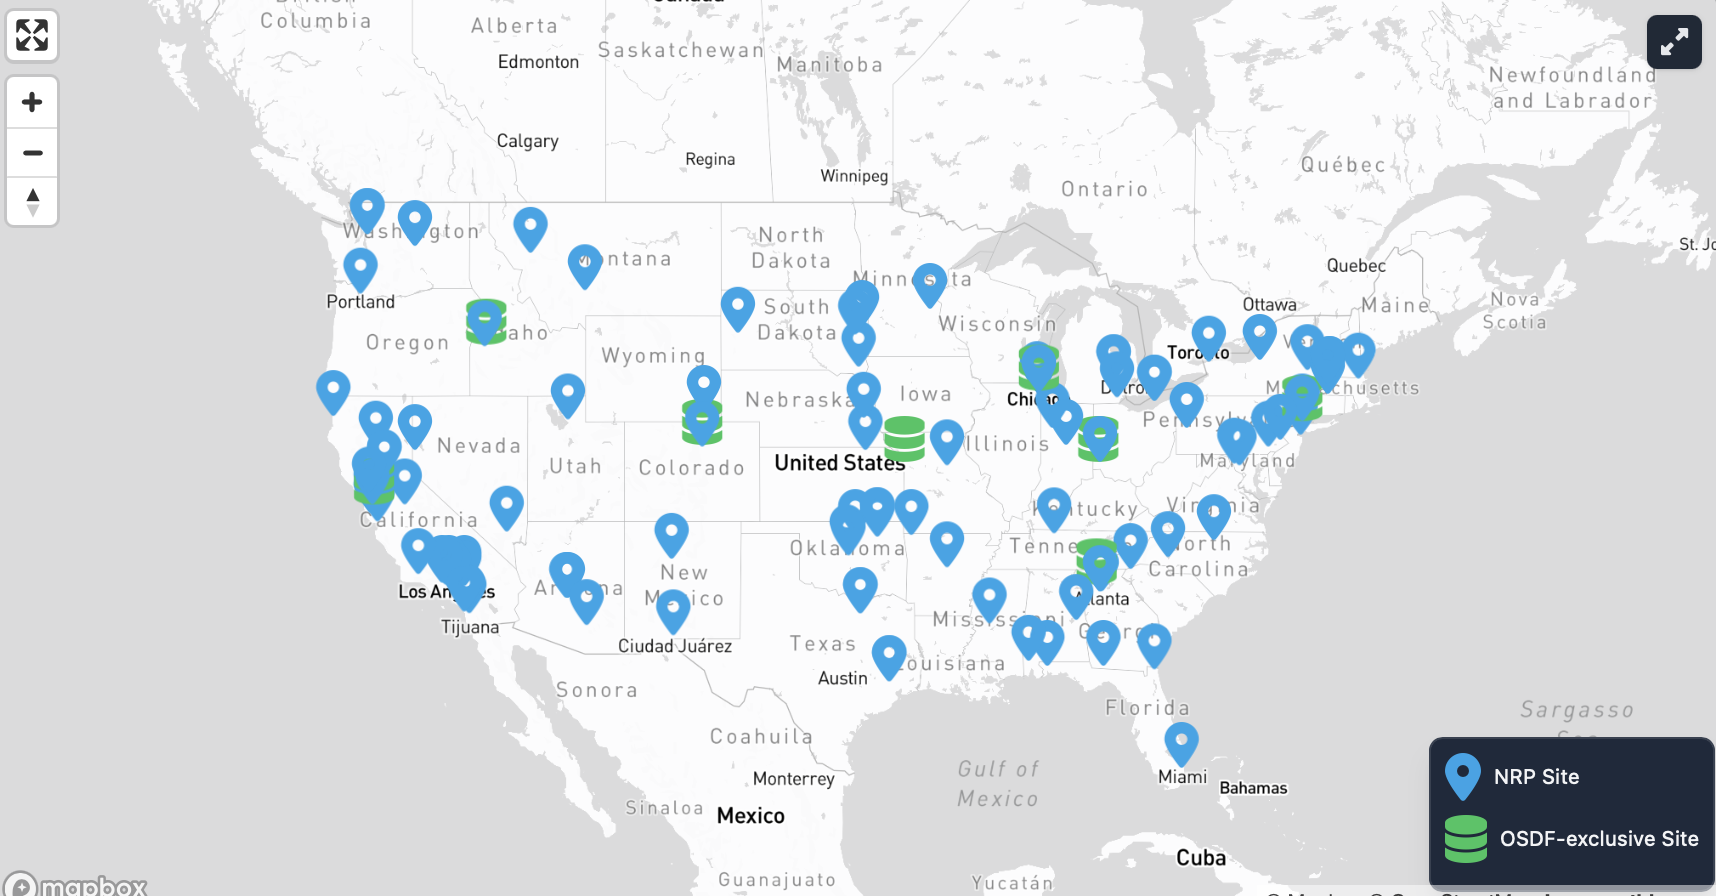
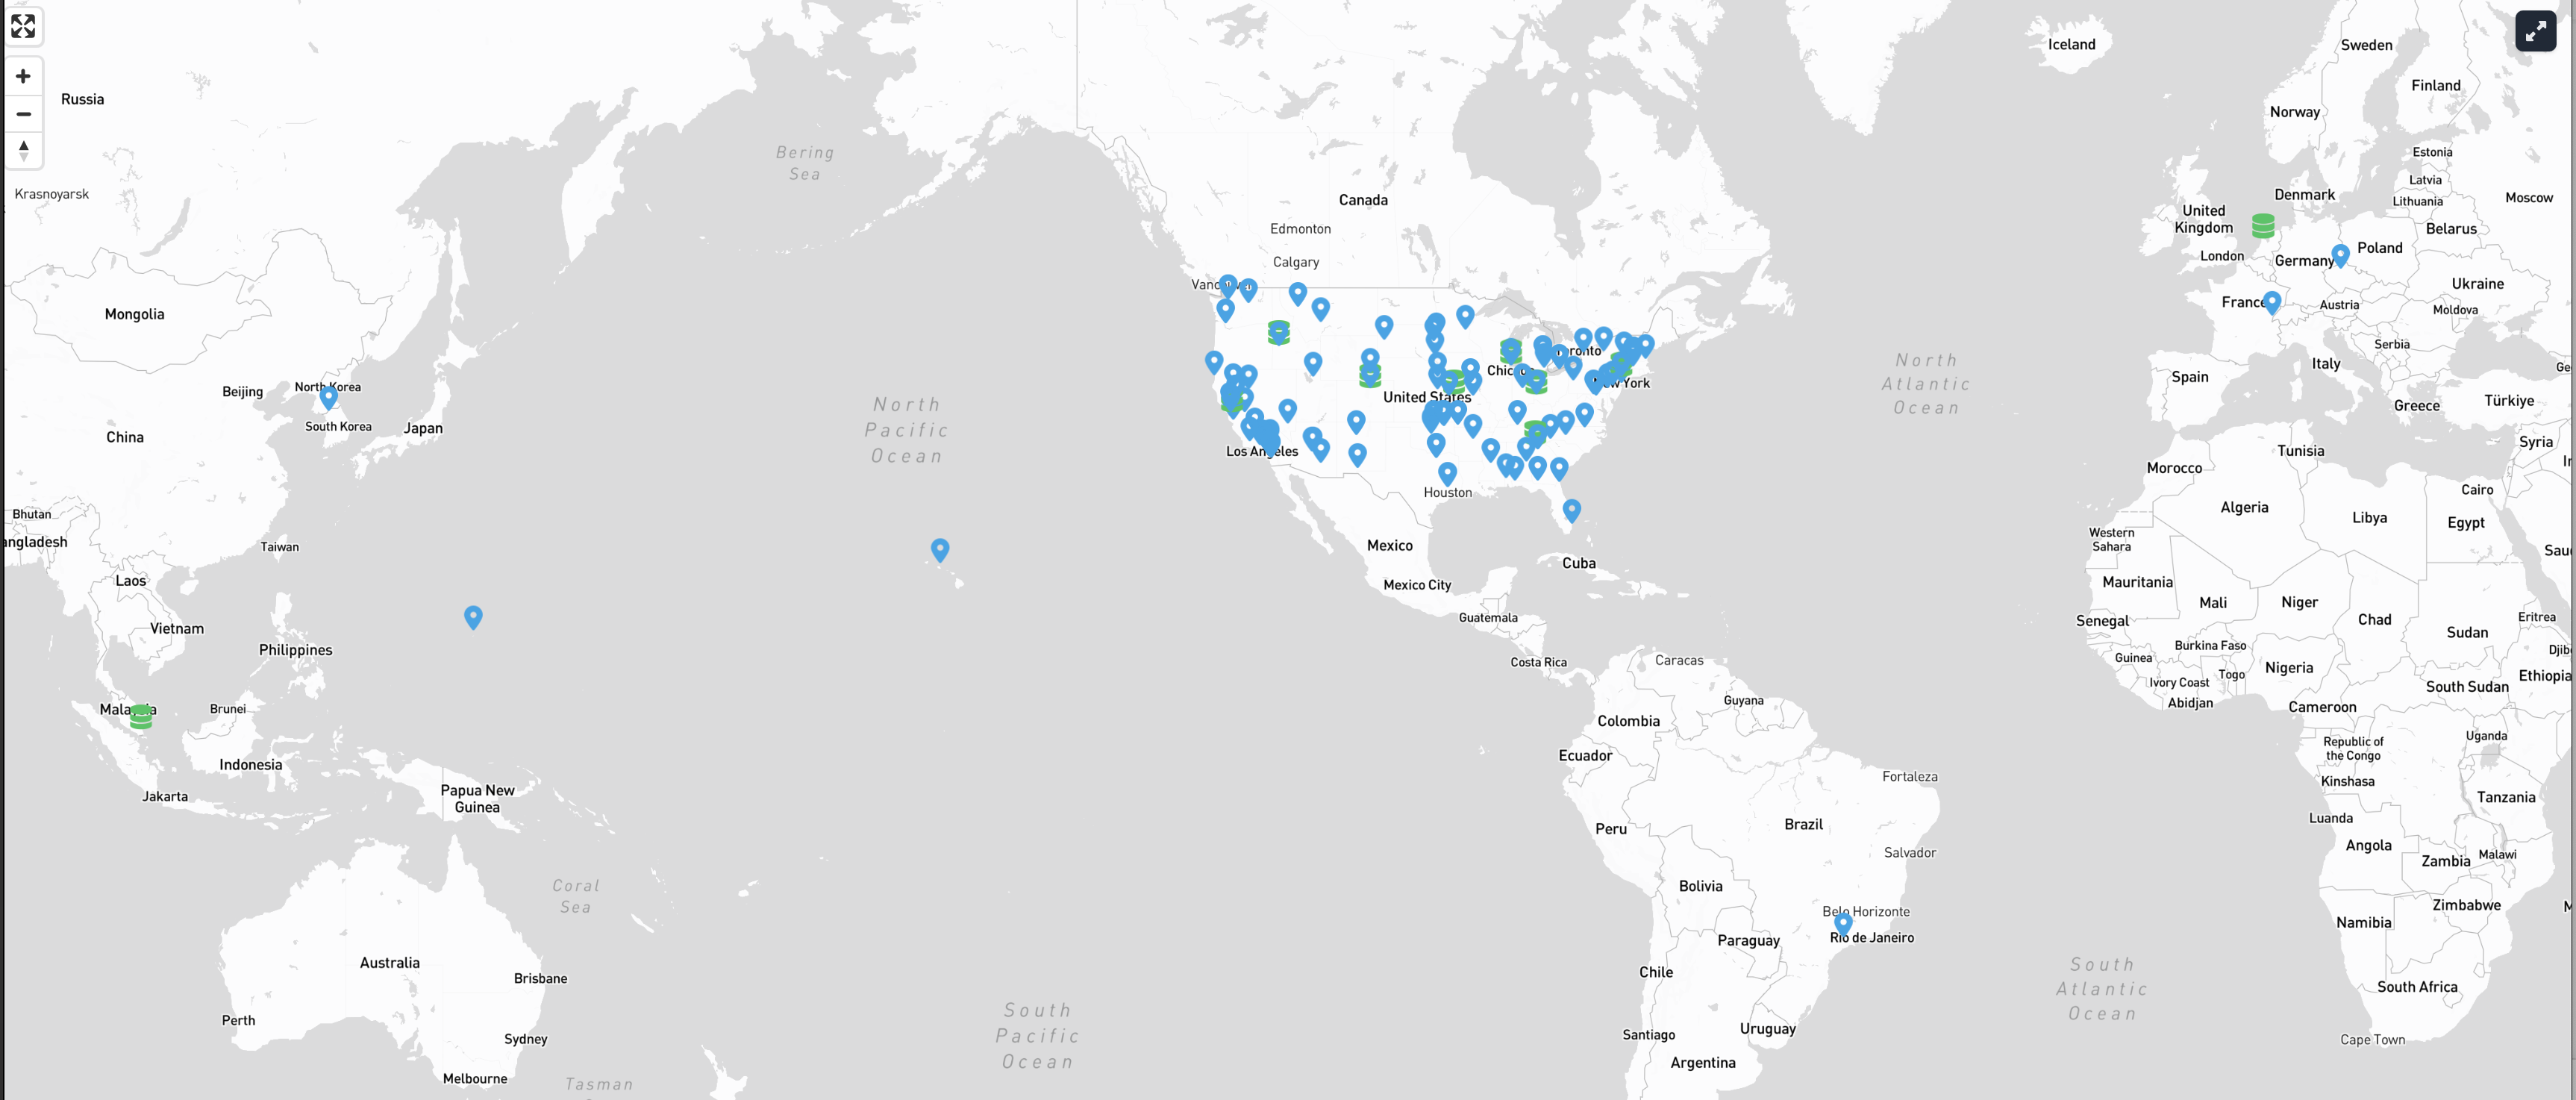
The National Research Platform is shared national cyberinfrastructure built on the Nautilus Kubernetes cluster: hundreds of nodes, many NVIDIA GPU types, Qualcomm Cloud AI 100 accelerators, shared storage, and hosted services — JupyterHub, GitLab, S3, and a managed LLM inference endpoint.
The mental model is short:
- CILogon authenticates users through their institutional identity provider.
- JupyterHub gives each participant a browser-based JupyterLab workspace and terminal.
- Kubernetes runs the workloads; users interact with it through
kubectland YAML. - Helm packages a whole application — like a JupyterHub — into one installable chart.
Scale
- ~500 nodes
- ~1400 GPUs
- ~30 FPGAs
Click to reveal more
Capabilities
- Storage: CephFS, CVMFS, S3
- Compute and data tools: JupyterHub, GitLab, Nextcloud, Overleaf, WebODM
- Monitoring: Prometheus, PerfSONAR
- AI services: managed LLM inference on NRP GPUs
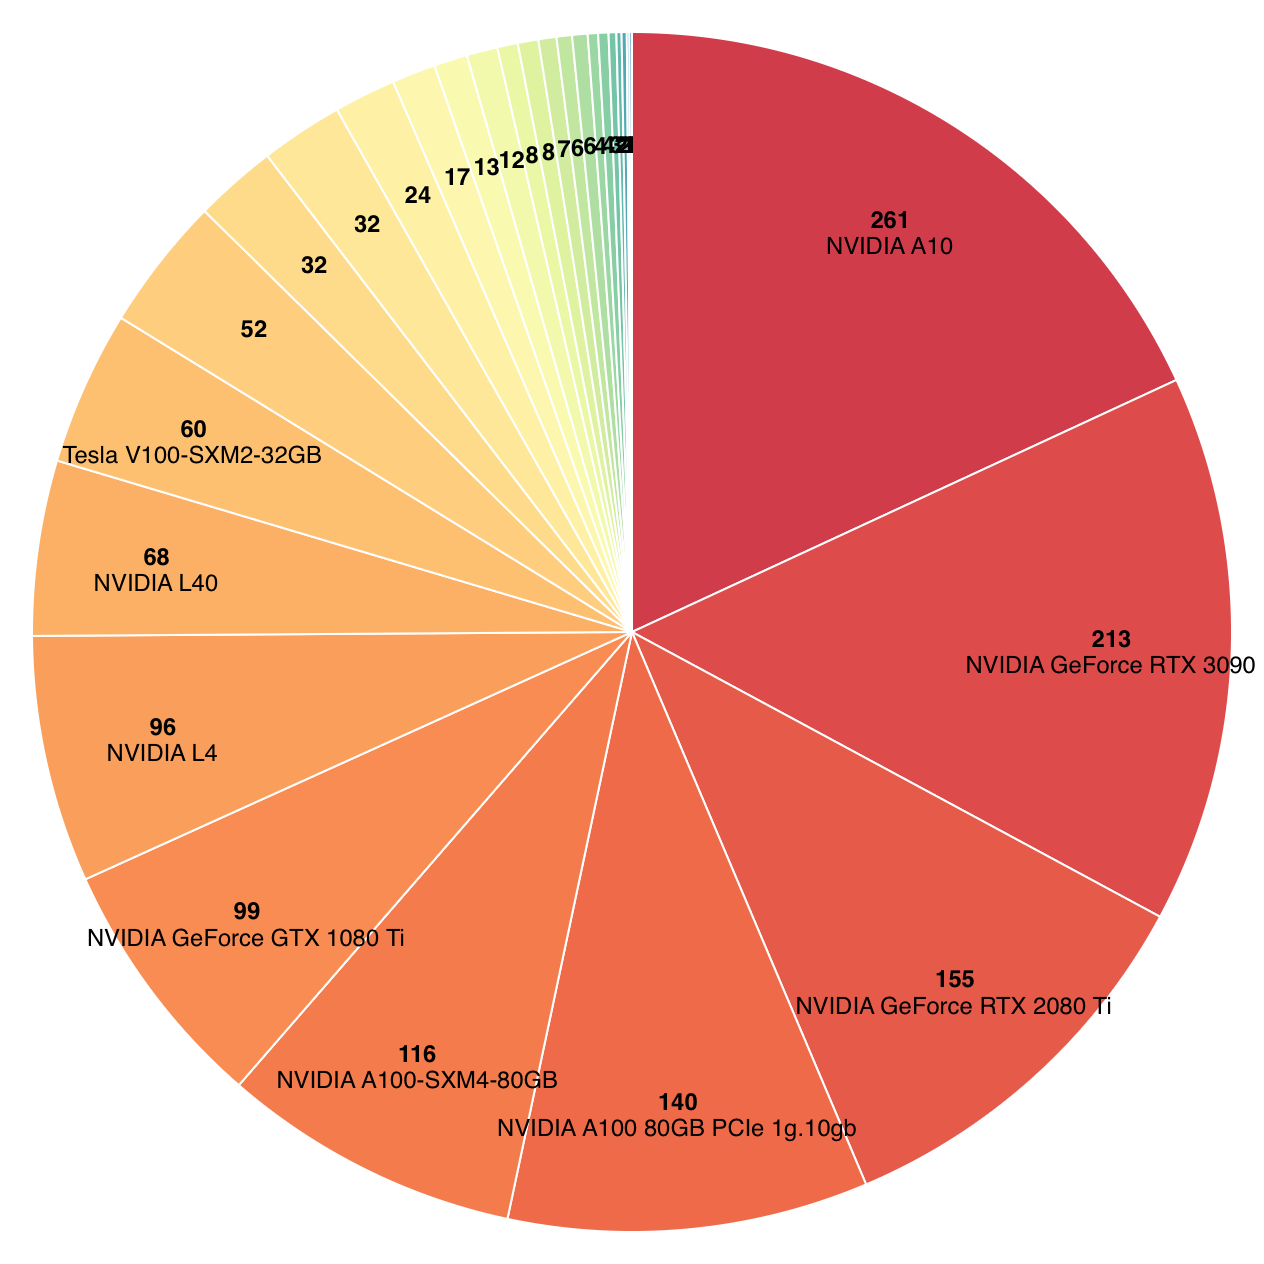
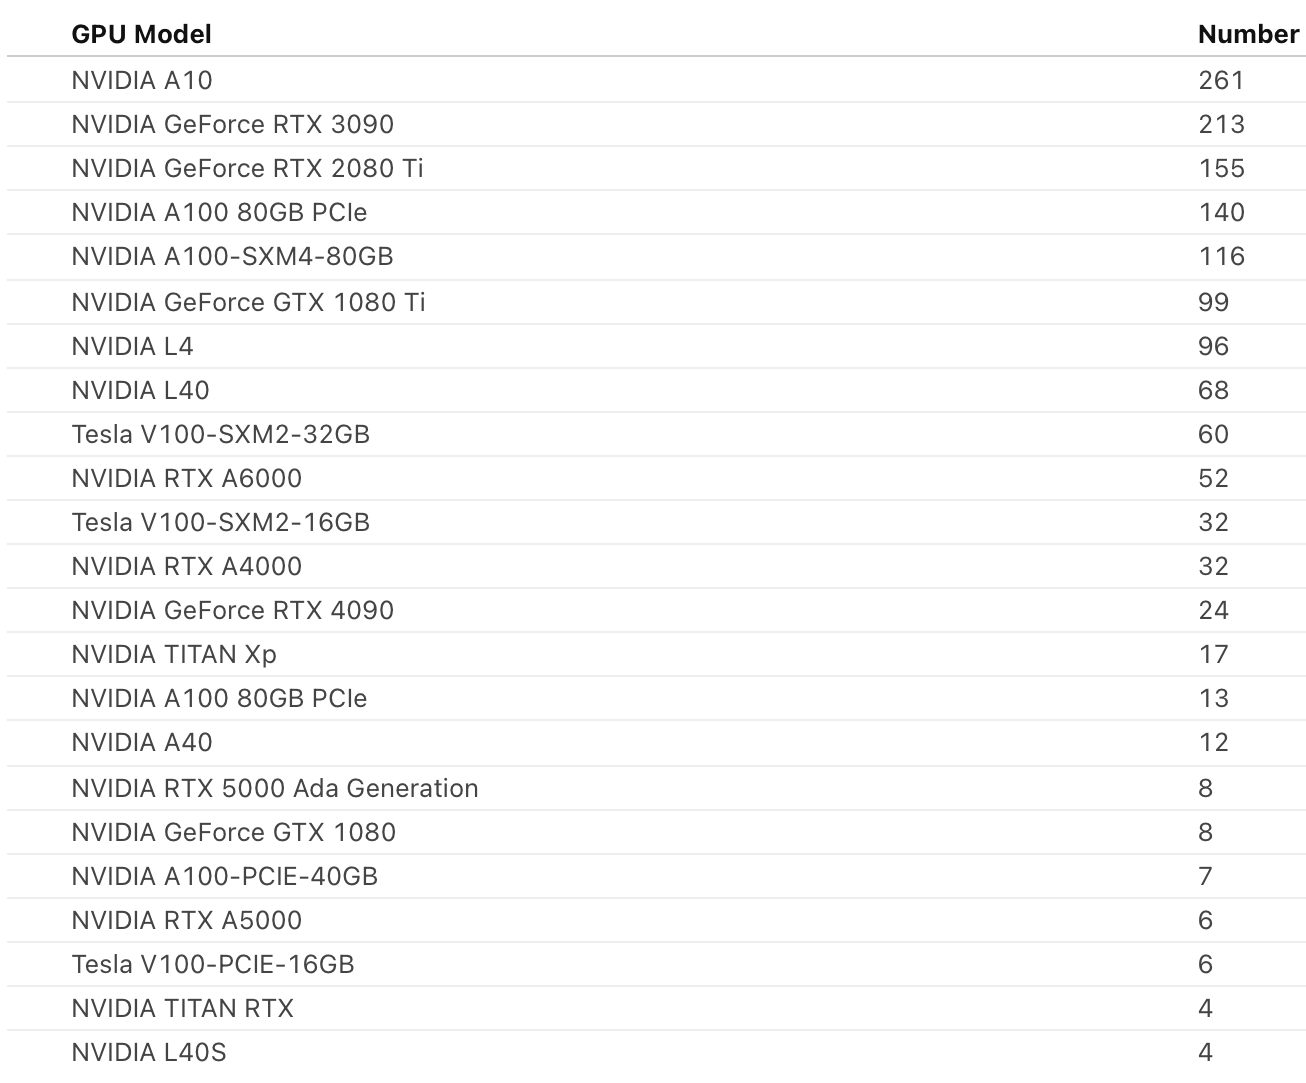
GPUs on the cluster
NRP has many GPU types available across the cluster — they are not interchangeable, so a course should ask for a class of GPU that matches the work.
Interacting with NRP
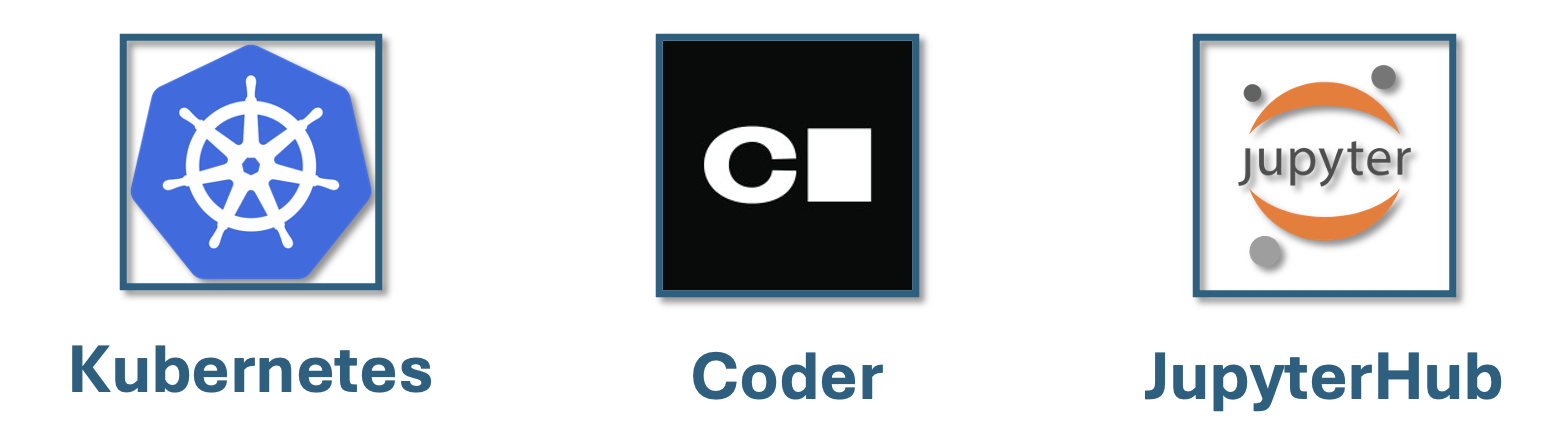
The majority of NRP users interact with the cluster using the following three methods.
- via Kubernetes: Directly submit and manage containerized workloads (services and batch jobs) using Kubernetes APIs and tools like
kubectl. - via the Coder service: Launch a browser-based VS Code environment connected to cluster resources for interactive development and execution.
- via NRP deployed JupyterHub: Start a JupyterLab notebook server on the cluster for interactive analysis, prototyping, and teaching workflows.
Today we use two of these. We deploy a JupyterHub — that is the whole point of the session — and we drive Kubernetes directly from a hub terminal to do it.
Access with CILogon
NRP authenticates through CILogon, so users sign in with an existing campus account — there is no separate NRP password to issue or reset. For a course, this is the single biggest operational win: enrollment is an allowlist, not a credential-distribution problem.
If you're following along, confirm your terminal is wired up:
Bash
kubectl version --client
kubectl auth whoami
kubectl config current-context
Namespaces: where a course lives
Compute on NRP lives in a namespace — a Kubernetes grouping that scopes resources and membership. For teaching, the namespace is the course:
- Admins (you, the instructor) add and remove members and create resources.
- Users (your students) work inside it.
- Admins are also responsible for members following cluster policy.
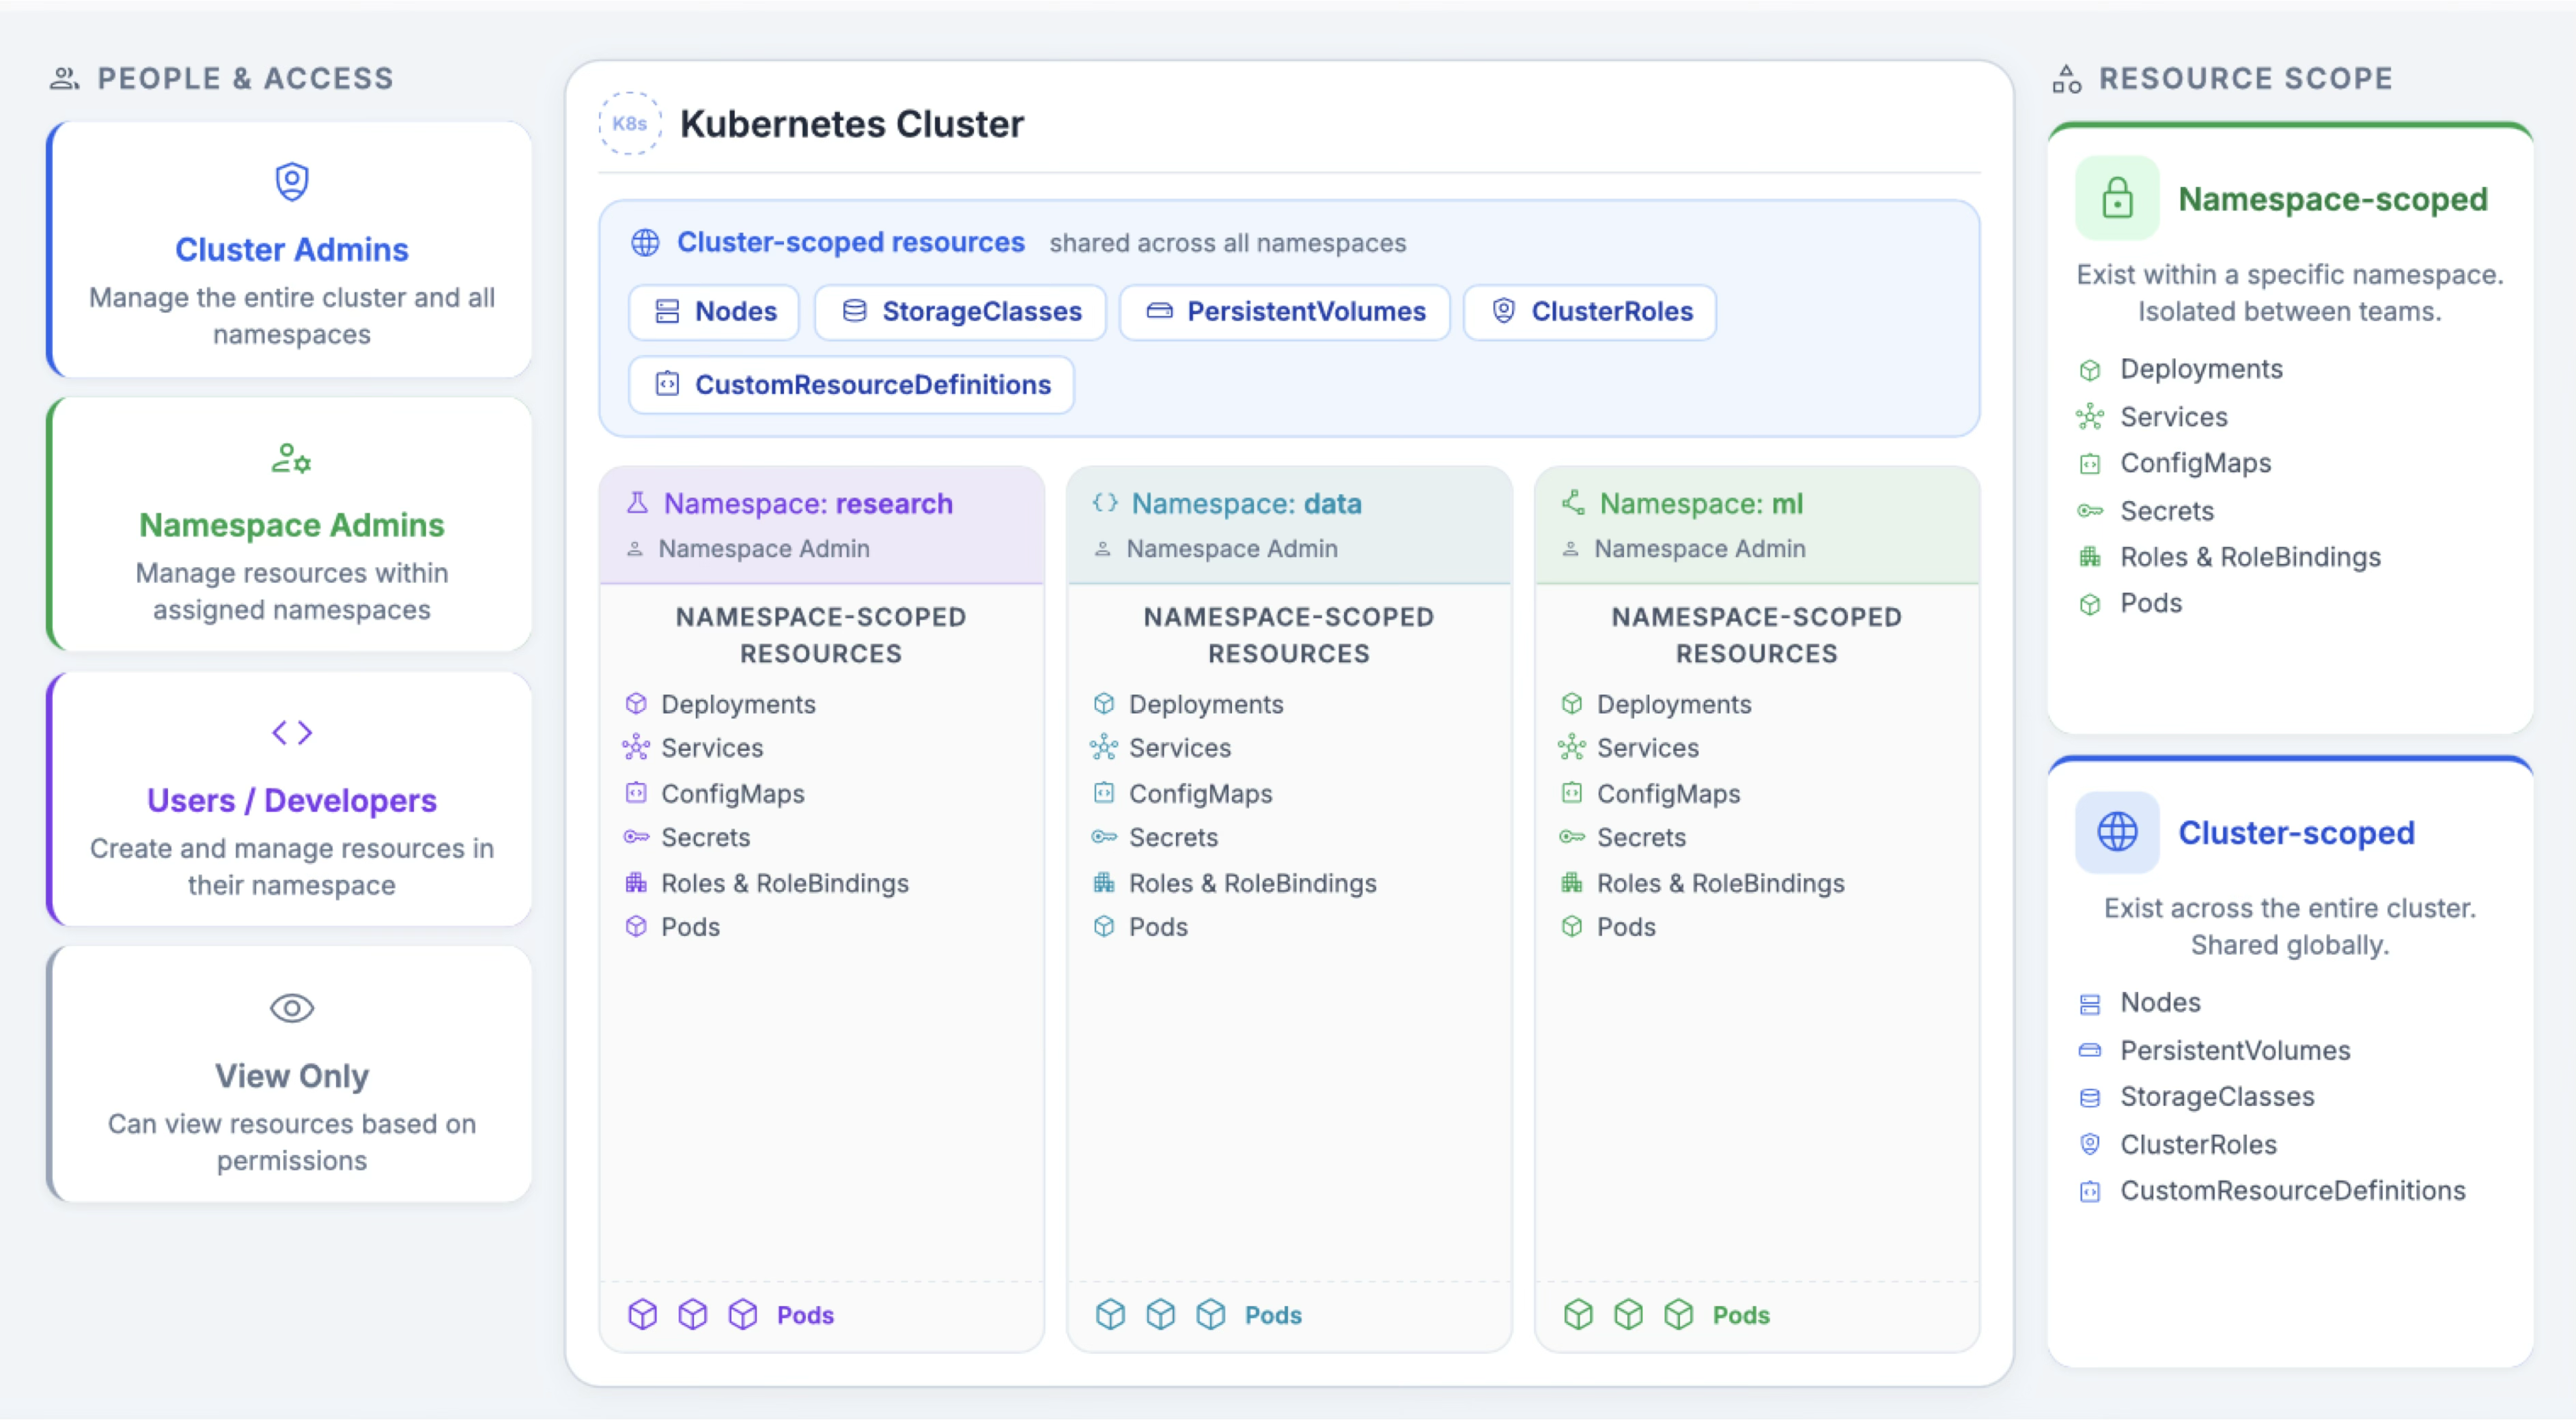
Most of what you create — pods, deployments, services, secrets, storage claims — is namespace-scoped: it lives in your course's namespace and is invisible to everyone else's. A smaller set of things is cluster-scoped and shared by the whole platform: the nodes themselves, StorageClasses, PersistentVolumes. That split is why a course namespace is a safe sandbox — students can fill it without touching anyone else's work.
A JupyterHub can be deployed once per namespace, so one namespace maps naturally to one course hub.
Seeing what's available
Before requesting anything, look at what the cluster actually has. The live resource view shows GPU models and counts, regions, node labels, and current utilization.
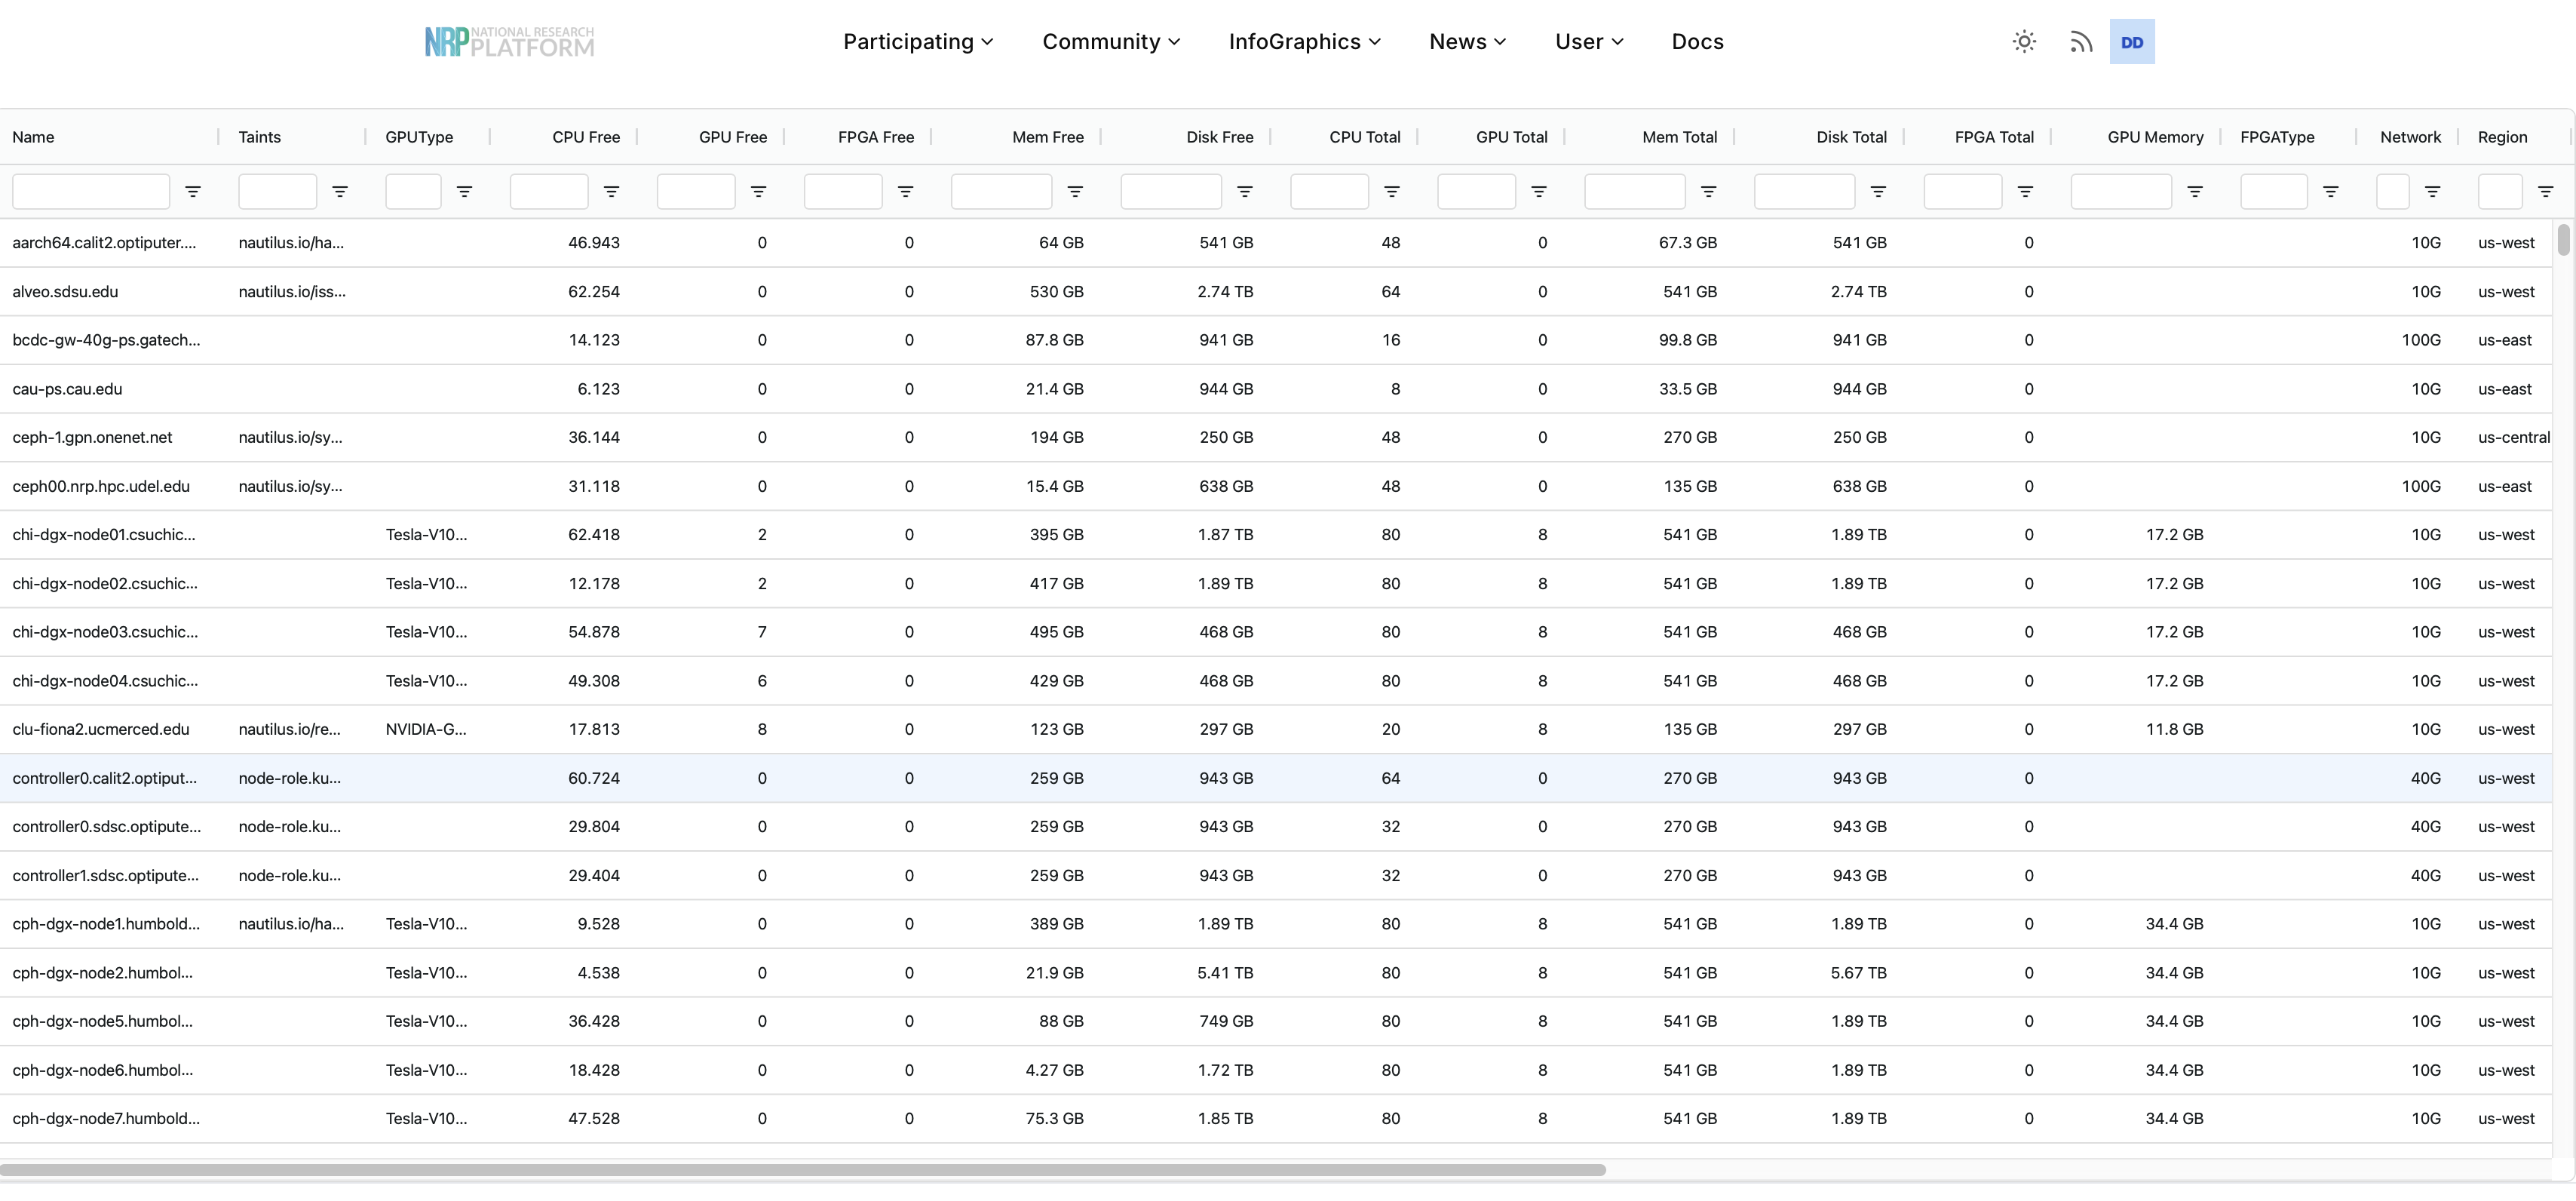
For classroom use, distinguish two levels of "request":
- Portal or allocation request: ask NRP for access, namespace membership, quotas, or exceptions needed for a class.
- Kubernetes workload request: ask the scheduler for CPU, memory, and accelerator devices inside a YAML manifest.
Requests are declarative — over-requesting doesn't make anything faster, it just makes your students wait for a slot.
Getting your own access
Three steps, and none of them need to happen live:
1. Register your identity. Go to portal.nrp.ai and sign in with CILogon (pick your institution), then complete Getting started.
2. Get into a namespace.
- Joining an existing project? Ask its admin to add you — send them the identity shown in the portal.
- Starting a course? Request a namespace and allocation through nrp.ai/contact, which is also the Matrix channel used for live help. Say what you're teaching and roughly what you need — number of students, whether the course needs GPUs, and when the term starts.
3. Point kubectl at NRP. Install kubectl and the kubelogin plugin, then grab your kubeconfig (cluster access via kubectl):
Bash
mkdir -p ~/.kube
curl -o ~/.kube/config -fSL https://nrp.ai/config
kubectl config get-contexts
kubectl get pods -n <your-namespace>
Key Points
- NRP is shared national cyberinfrastructure built on the Nautilus Kubernetes cluster.
- CILogon means students sign in with existing campus credentials — no new passwords.
- Compute lives in a namespace tied to a project or course.
- A classroom hub is one Helm release plus one values file you keep in version control.
Next
With access and a namespace, everything in the next section works against your own course. Deploy a Custom JupyterHub & Build Images in NRP GitLab is the deployment itself.