
Introduction — LLMs on NRP
- What LLM resources does NRP provide for researchers?
- How do I get access?
- What can I do with these resources?
- Understand what the NRP managed LLM service is and what models are available.
- Know how to obtain an API token and reach the endpoint.
- Identify the browser-based and programmatic entry points.
Overview
The National Research Platform (NRP) makes large language models available to the research community through a managed, OpenAI-compatible inference endpoint. You do not need to rent cloud credits, install model weights, or request a GPU — you just point any OpenAI-compatible tool at NRP's URL and authenticate with a personal token.
This lesson covers what is available, how to get access, and the different ways you can interact with the models.
What NRP Provides
NRP exposes two complementary AI/LLM resources:
1. Managed LLM Service
A rotating catalog of open-weights models hosted on NRP GPUs, reachable two ways:
- Programmatically, behind a single OpenAI-compatible REST endpoint:
`` https://ellm.nrp-nautilus.io/v1 ``
You authenticate with a bearer token (see Getting Access below). The endpoint speaks the OpenAI API, so any tool that supports a custom base_url works out of the box.
- In the browser, via Open WebUI, signed in with your NRP account — no API token needed. Useful for quick experiments and sharing demos with collaborators.
Currently available models (see live list):
| Model | HuggingFace ID | Parameters | Context | Tools | Vision | Notes |
|---|---|---|---|---|---|---|
qwen3 | Qwen/Qwen3.5-397B-A17B-FP8 | 397B (17B active MoE) | 1.01M | ✓ | image, video | Largest context |
qwen3-small | Qwen/Qwen3.6-27B | 27B | 1.01M | ✓ | image, video | |
gpt-oss | openai/gpt-oss-120b | 120B | 131K | ✓ | — | Strong at code |
gemma | google/gemma-4-31B-it-qat-w4a16-ct | 31B | 262K | ✓ | image, video | |
gemma-small | google/gemma-4-12B-it-qat-w4a16-ct | 12B | 262K | ✓ | image, video | Evaluating — fast, good default |
minimax-m2 | MiniMaxAI/MiniMax-M2.7 | 230B | 204K | ✓ | — | Evaluating — strong reasoning |
glm-5 | nvidia/GLM-5.2-NVFP4 | 744B | 300K | ✓ | — | Evaluating |
deepseek-v4-flash | deepseek-ai/DeepSeek-V4-Flash-0731 | 304B | 1.05M | ✓ | — | Evaluating |
kimi | moonshotai/Kimi-K2.7-Code | 1T MoE | 131K | ✓ | image, video | Evaluating |
qwen3-embedding | Qwen/Qwen3-VL-Embedding-8B | 8B | 262K | — | image, video | Embeddings only — semantic search/RAG |
Evaluating models are under active testing — configuration can change without notice; stick to the others for anything you need to be stable through the workshop.
For most tasks, start with gemma-small (fast) or minimax-m2 (strong reasoning). Switch to qwen3 when you need the largest context window.
Models occasionally restart or roll over to a new version — check what's currently up at the LLM status dashboard.
2. Bring-Your-Own GPU
For workloads requiring full model control — custom weights, fine-tuning, custom quantization, or private inference — you can request your own GPU pod in your namespace and run any inference server (vLLM, TGI, Ollama, etc.). This is covered in other NRP training sessions.
Getting Access
Step 1: NRP Account
You need an NRP account associated with your institutional credentials. If you don't have one yet, follow Getting Started with NRP.
You also need to belong to a namespace with LLM access enabled — this is a per-namespace feature flag, so an account alone is not sufficient. For this tutorial, ask Daniel Diaz to add you to the CLARIPHY namespace, which already has it enabled. See Setup.
Step 2: Get an API Token
Go to https://nrp.ai/llmtoken and click Get LLM token. A personal bearer token will be sent to your email or displayed on the page.
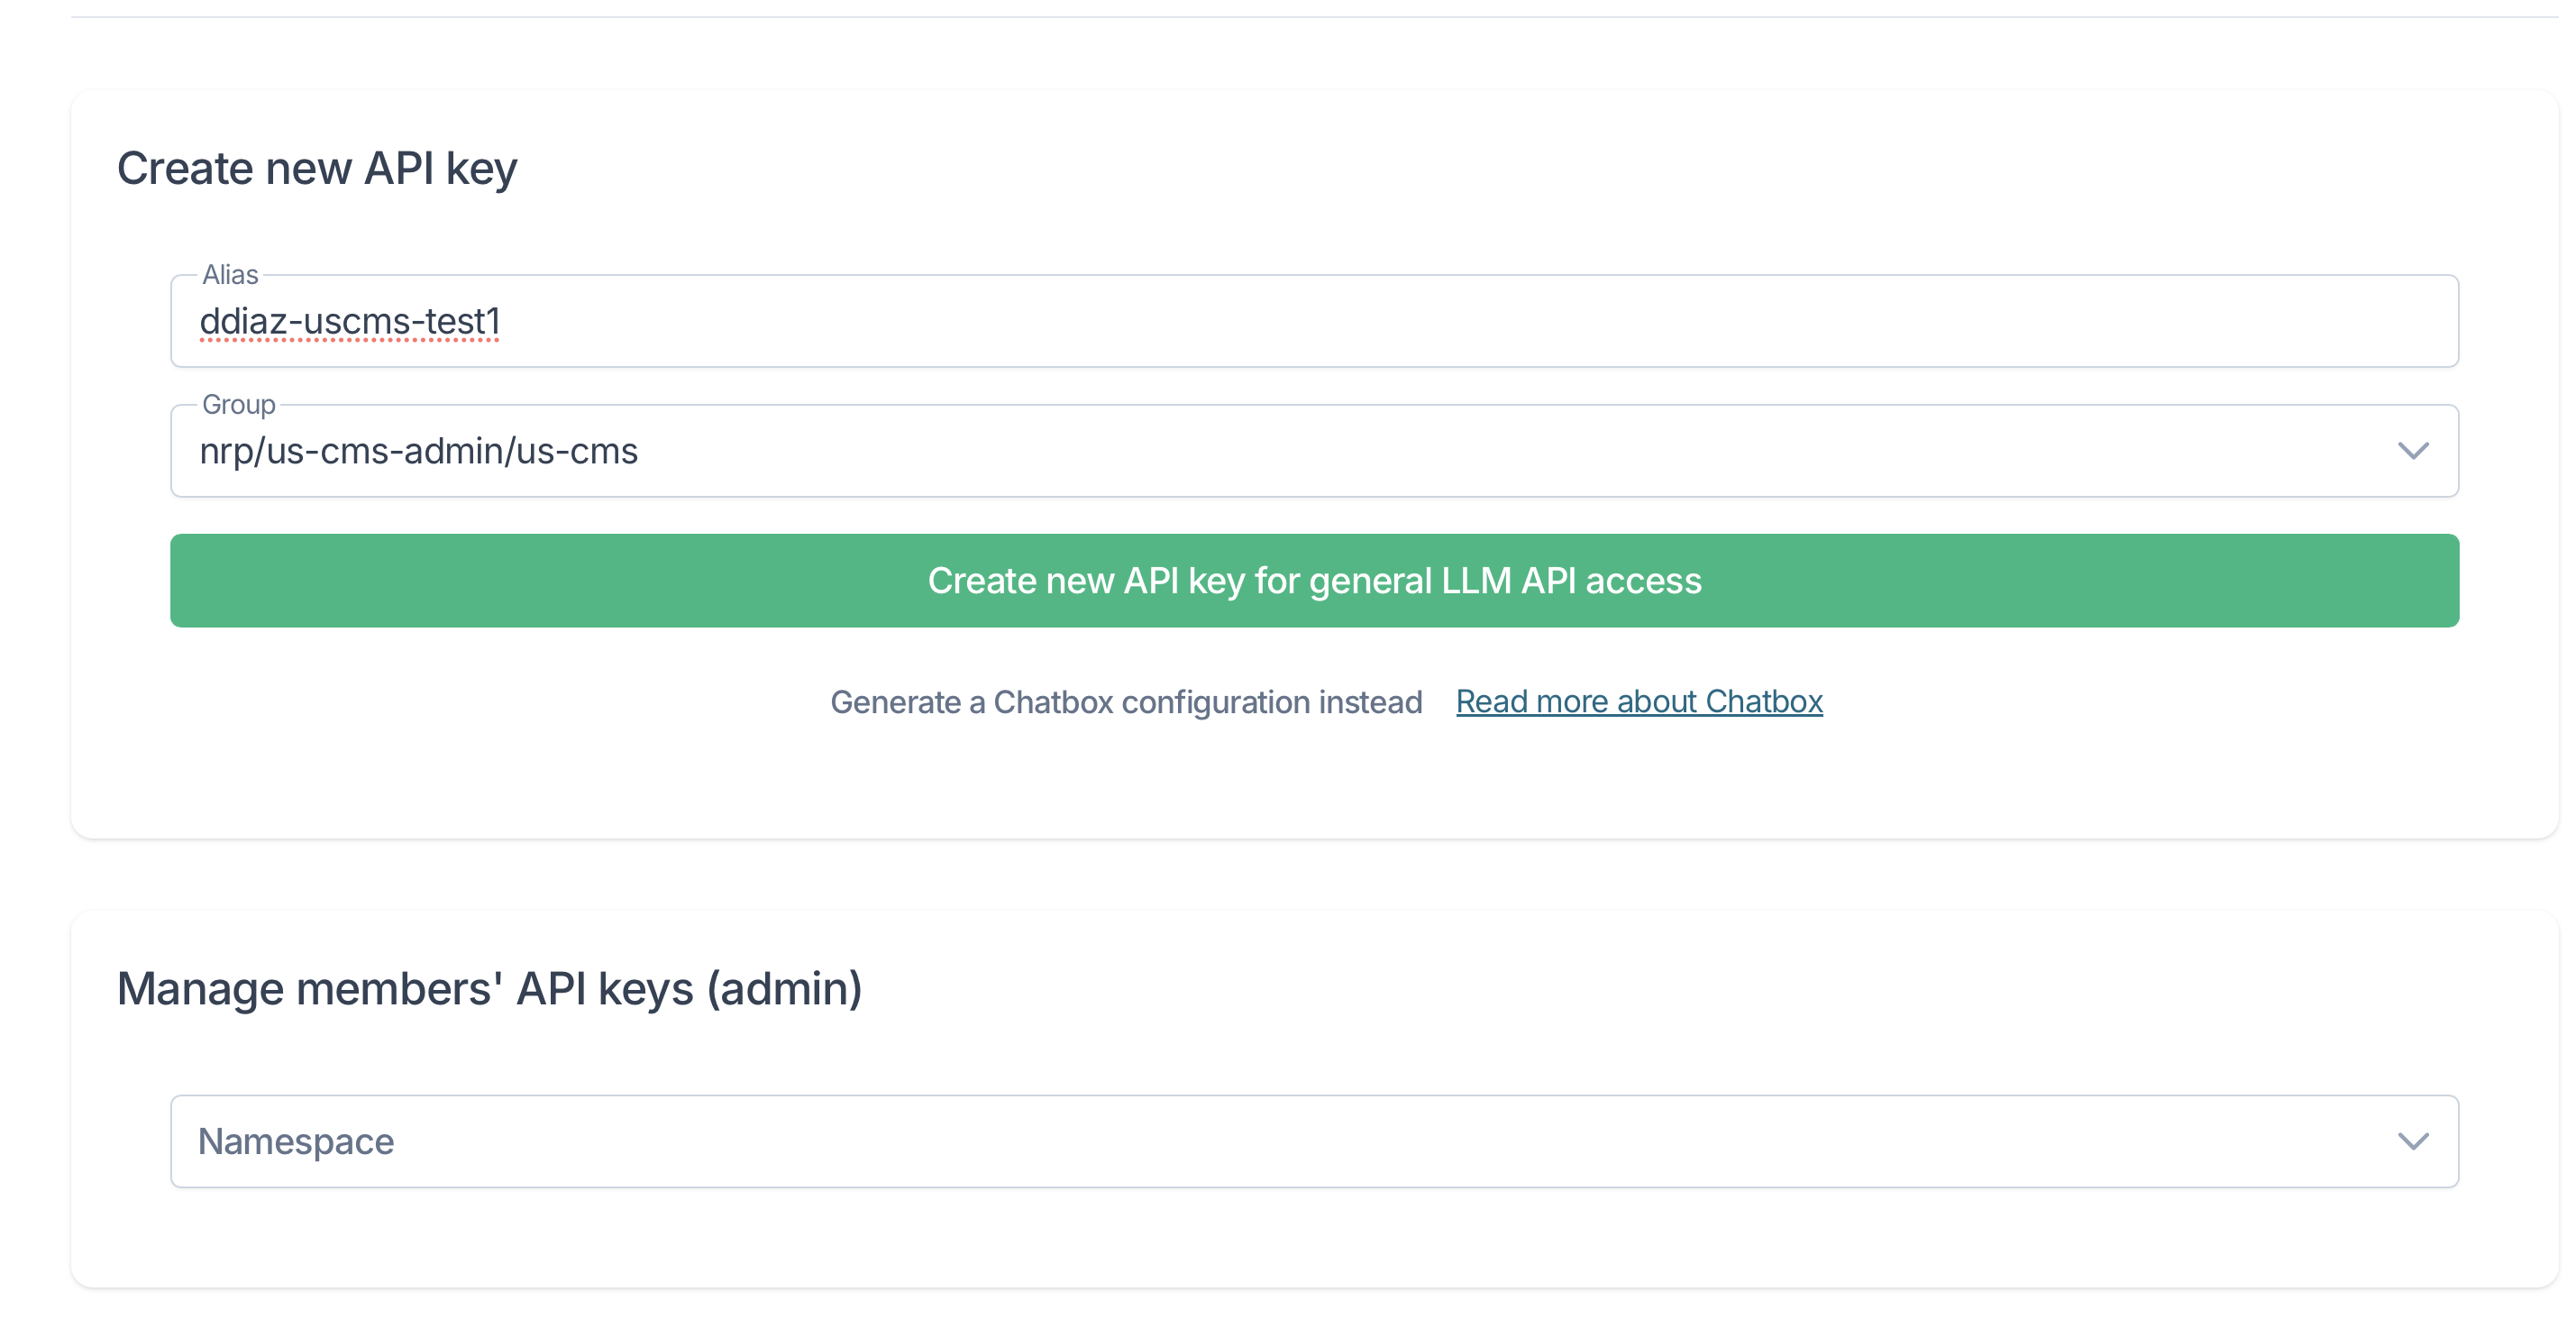
Treat your personal token like a password. Do not commit it to git or share it publicly. In notebooks and scripts, read it from an environment variable (OPENAI_API_KEY) rather than hard-coding it.
To use it from a terminal, set your token and the endpoint URL in that terminal — they last until you close it. In a JupyterHub terminal, or on macOS, Linux or WSL:
export OPENAI_API_BASE="https://ellm.nrp-nautilus.io/v1"
export OPENAI_API_KEY="<paste-your-token-here>"
In Windows PowerShell:
$env:OPENAI_API_BASE = "https://ellm.nrp-nautilus.io/v1"
$env:OPENAI_API_KEY = "<paste-your-token-here>"
Replace the placeholder with your token. Setting these from inside a notebook works a little differently — see the setup check at the start of Lesson 2.
Step 3: Verify Access
From a bash terminal — a JupyterHub terminal, or macOS, Linux or WSL — send a real chat request. This actually exercises the model, not just the endpoint, so it's a more meaningful check than listing models:
curl -s -X POST "$OPENAI_API_BASE/chat/completions" \
     -H "Authorization: Bearer $OPENAI_API_KEY" \
     -H "Content-Type: application/json" \
     -d '{"model": "minimax-m2", "messages": [{"role": "user", "content": "What is the National Research Platform?"}]}'
You should get back a JSON response with a real answer buried in it (something about a distributed, Kubernetes-based US research cyberinfrastructure).
For a cleaner look, pipe it through Python to pull out just the reply text:
curl -s -X POST "$OPENAI_API_BASE/chat/completions" \
     -H "Authorization: Bearer $OPENAI_API_KEY" \
     -H "Content-Type: application/json" \
     -d '{"model": "minimax-m2", "messages": [{"role": "user", "content": "What is the National Research Platform?"}]}' \
  | python3 -c 'import json, sys; d = json.load(sys.stdin); print(d["choices"][0]["message"]["content"] if "choices" in d else d)'
If the token is wrong, this prints the error message from the endpoint instead of a reply.
You can also list the full model catalog:
curl -s -H "Authorization: Bearer $OPENAI_API_KEY" \
     "$OPENAI_API_BASE/models" \
  | python3 -m json.tool | head -20
On Windows, or if you'd rather stay in Python, the Setup Check at the start of the Chat notebook runs the same test from a notebook cell.
Entry Points at a Glance
| Method | Where | When to Use |
|---|---|---|
| Open WebUI | Browser | Quick questions, no coding |
Python openai SDK | Notebook / script | Programmatic use, RAG, embeddings |
curl | Terminal | Quick smoke tests, scripting |
| Agentic tools (opencode, VS Code, Claude Code) | Terminal / IDE | AI-assisted coding and research |
How to Get Help
- NRP support chat (Slack / Matrix): https://nrp.ai/contact/
- NRP documentation: https://nrp.ai/documentation/
- LLM-specific docs: https://nrp.ai/documentation/userdocs/ai/llm-managed/
Run the Notebooks
You can run the notebooks for this training either on the NRP training hub or on your own machine (local setup) — the training hub is recommended since the packages are already installed for you. You'll still need your own personal API token either way (see Getting Access above).
▶ Launch the workspace in JupyterHub — signs you in at jh-training.nrp-nautilus.io, pulls the tutorial workspace, and opens JupyterLab with the notebooks for this training.
The next page, Launch the Agent, sets up an AI agent that runs a complete physics analysis from your own laptop. It needs tens of minutes of unattended time, so start it first — it keeps working while you do the notebook lessons, and you check its results in the last lesson.
- NRP runs an OpenAI-compatible managed LLM endpoint at
https://ellm.nrp-nautilus.io/v1. - Access requires an NRP account and a personal token from
https://nrp.ai/llmtoken. - The Open WebUI browser UI requires no token — sign in with your NRP account.
- LLM access is a per-namespace feature — your namespace must have it enabled.
- The same
openaiPython SDK works against NRP, commercial providers, and your own GPU pods.